
If you still struggle growing cauliflower, I hope this article and the information I share with you, will give you new hope and equip you with the knowledge needed to grow your own cauliflower head finally! Follow the knowledge I gained from my own trials and errors and you will succeed. I was on your side till I learned from my mistakes. Good luck!
- Cauliflower can be started indoors before the last frost about 6 weeks before the last frost date.
- Sow the seeds in a good quality potting mix, one seed per seed cell sowing the seeds ½ inch deep. Cover, tamp, and water thoroughly.
- Water the seeds daily, do not let the soil dry out as it would slow the germination process or could kill sprouting seeds.
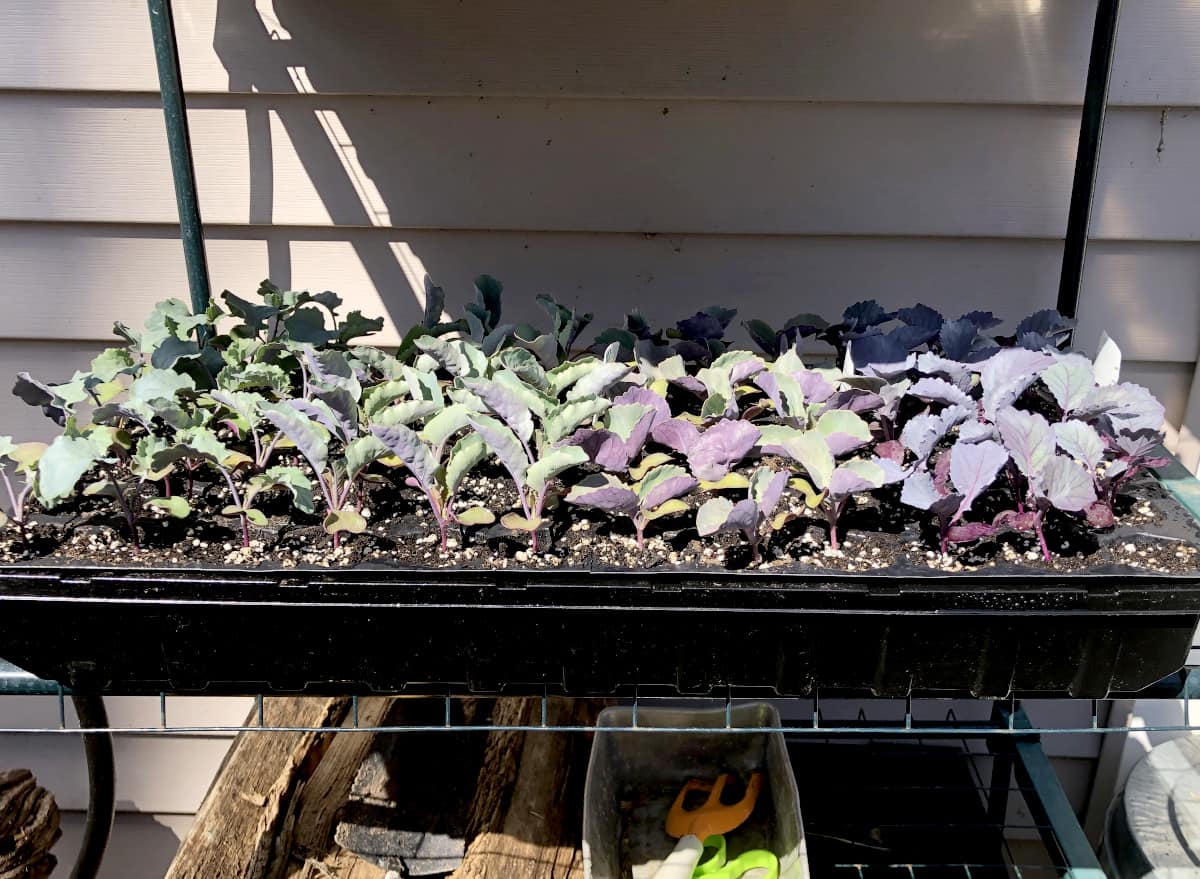
- Once the seeds have 2 sets of true leaves, start to harden off the seedlings.
- Cauliflower can be planted before the last frost date as it is a cool-weather vegetable and is hardy up to 26F. If the temperatures fall lower than 26F, cover with garden frost cover.
- Once the seedlings are hardened off, plant cauliflower seedlings in their permanent place.
- Choose a full-sun location with at least 6-8 hours of sunlight.
- Prepare the soil for planting by loosening it up if needed, and amending it with organic matter like compost, worm castings, or aged animal manure. If the structure of the soil needs to be improved, inorganic amendments like vermiculite, perlite, or sand can also be mixed in.
- To plant the seedlings, dig a hole about as deep as the seed cell, or a pot the seedlings are in. Settle the seeding in a hole and cover it with the soil. Tamp and water thoroughly.
- About a week or two after planting feed the plants with a fertilizer. Or just follow the instruction on the label of your preferred fertilizer.
- Water with 1 inch of water at the base of the plant weekly. Always check the soil’s dryness. It needs watering if the soil feels dry when you stick an index finger an inch deep.
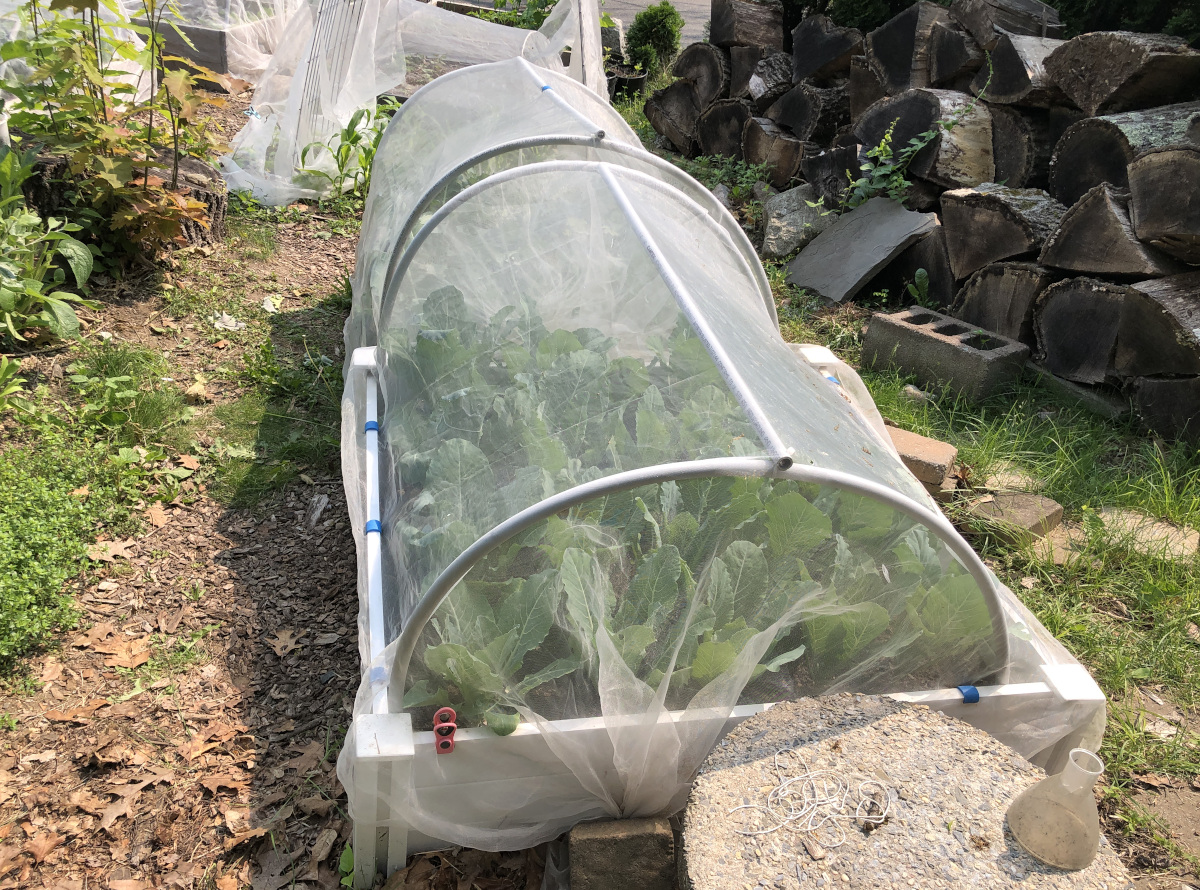
- Protect all brassicas including cauliflower with a netting covering to protect them from slugs, snails, cabbage months, and other pests.
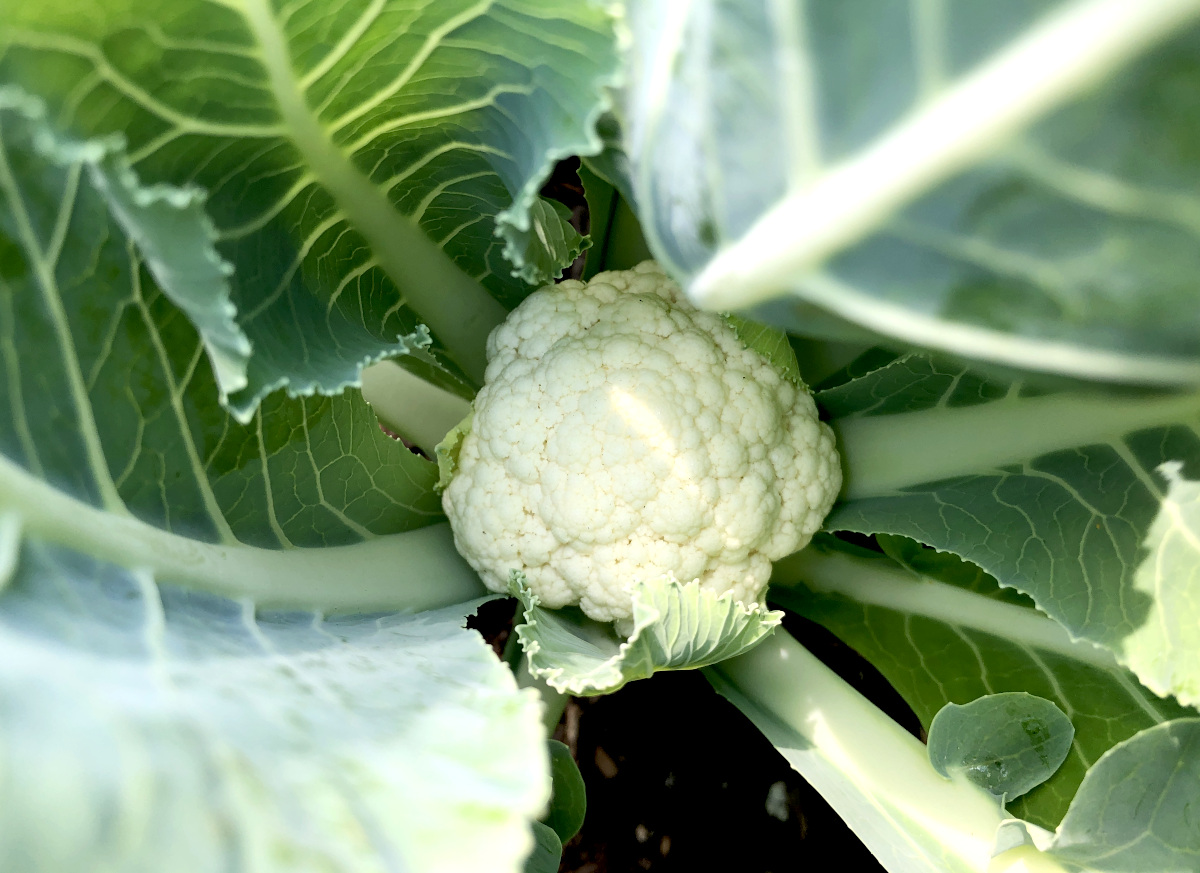
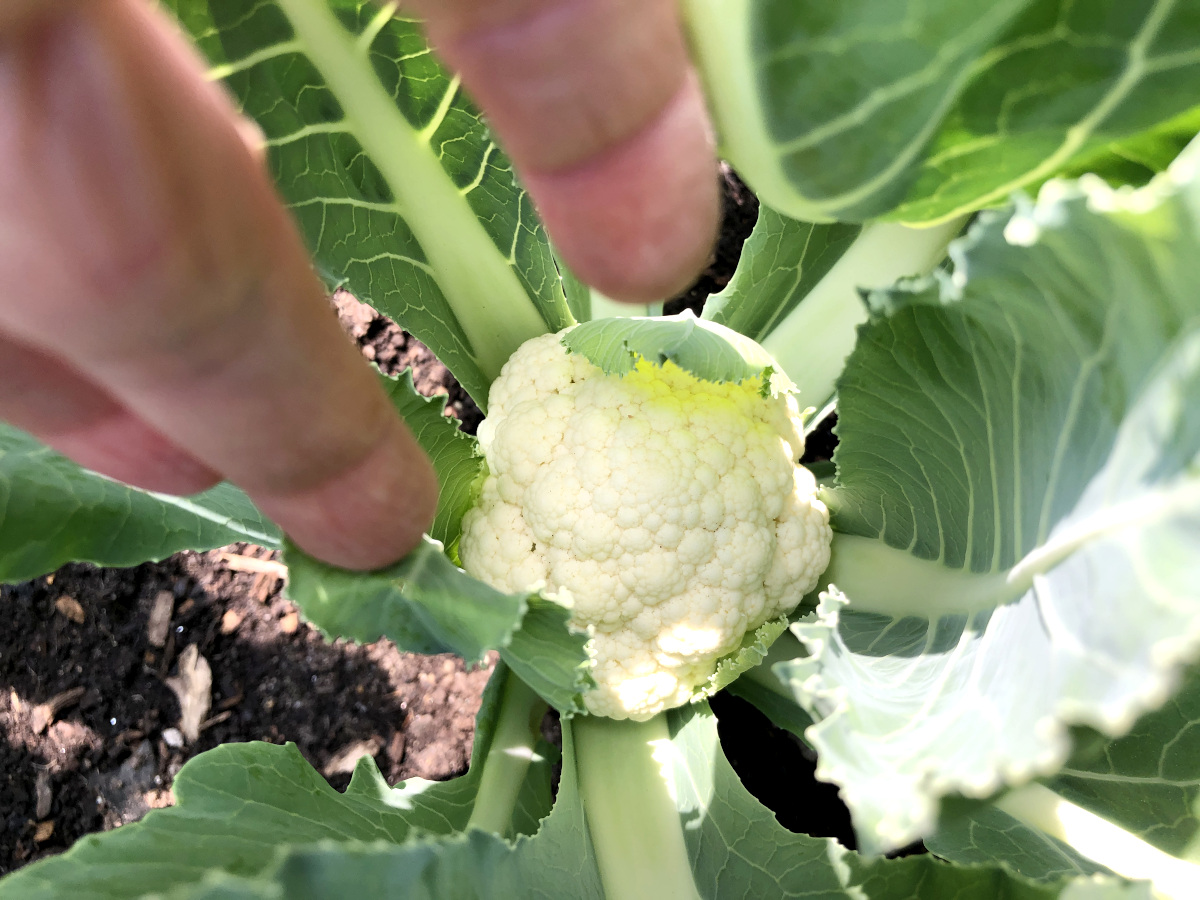
- Harvest once the cauliflower head is of usable size, and curds are still tight.
TIP: Depending on the cultivar, most brassicas, including cauliflower, bolt, meaning flower, and produce seed. The best time to grow cauliflower is in early spring before high temperatures hit. If you wish to grow cauliflower in warmer weather then choose a cultivar that was cultivated for hot weather and is heat tolerant, otherwise, the plant will bolt.
For moderate summer heat, Snow Crown and Amazing is a good one to grow. If you want to be a little more experimental, in hot and humid areas try Song TJS-65 cultivar that derives from Asia.
The best time to grow cauliflower is early spring and fall when temperatures are in 60-ties F, no higher than 75F.
Easy vegetables to start from seed indoors
I use this mix to start my seeds. This mix is of very high quality and I only use it to start my seeds and to grow my Amaryllises. I use this mix because I do not have to fertilize my seedlings once sowed in this mix. It keeps moisture well and feeds my seedlings beautifully. I really do not like to use seed mixes or peat moss because most of them do not provide nutrients for my young tender seedlings, and then the leaves turn yellow or get stunted. Some seed starting mixes are also used to hold too much water or dry out very fast. This potting mix is so far the best I used and all my seedlings were well-fed and well-prepared for their best growth.
How to start seeds and care for seedlings
What is the best month to plant cauliflower?
The best month to plant cauliflower is early spring from late February to early April, and then again in late July for the fall crop. Cauliflower is a cool-weather vegetable and is sensitive to hot temperatures.
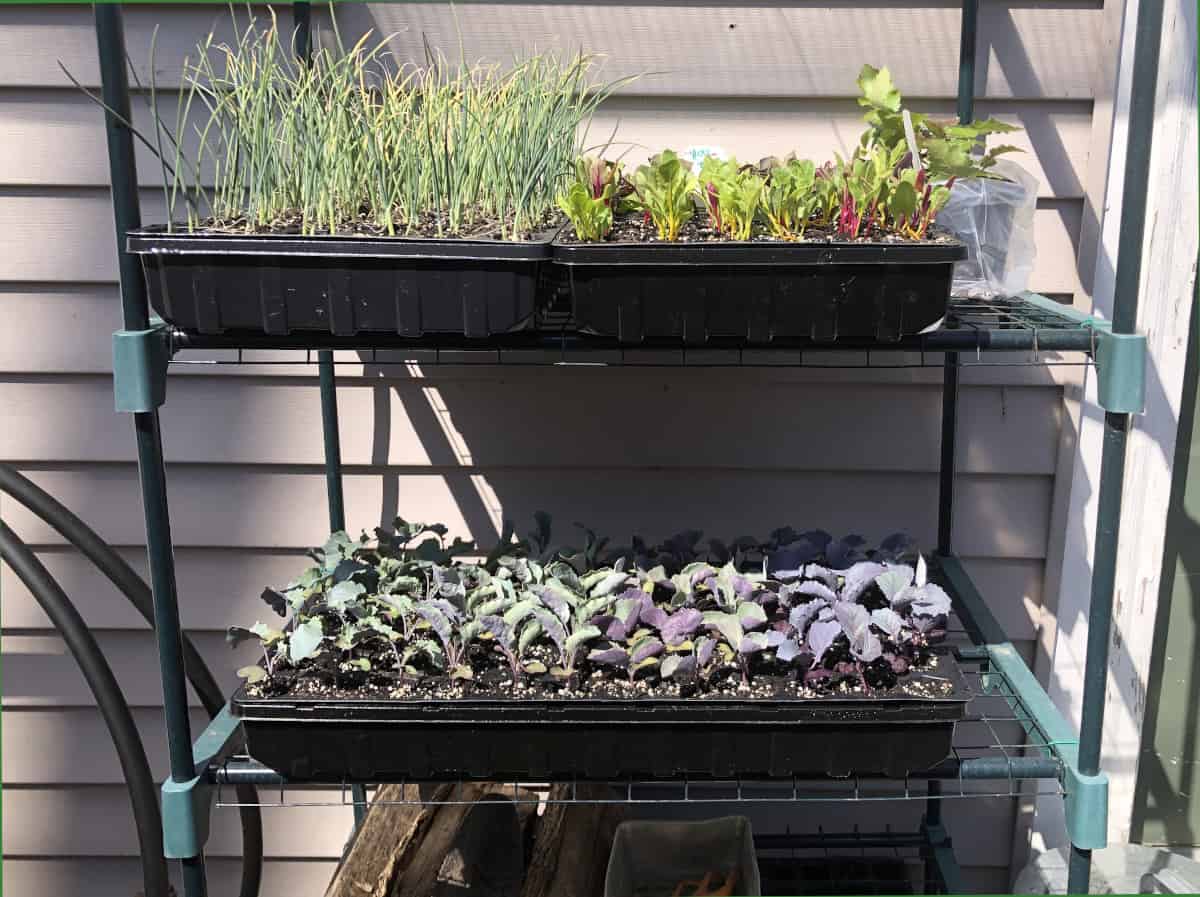
What month to start cauliflower seeds heavily depends on your hardiness zone. I sow my brassicas end of February and aim for April 1st to plant out my brassica seedlings.
Brassicas including cauliflower are our family’s favorite vegetable so yes, I grow cauliflower twice a year, in early spring and then again in late July for fall harvest.
How to protect cauliflower plants
Protect cauliflower plants by covering them with garden netting or tulle fabric. Inspect the plants regularly for pests and diseases. Remove any pests by hand or sprinkle with diatomaceous earth, or with a mix of water and dish soap.
A GOOD READ: Take a look at how I protect my vegetable garden at How to protect vegetable garden beds.
I place simple hoops in garden beds and cover my cauliflower and all brassicas with garden netting. This will protect them from cabbage moths, slugs, and wildlife that would like to munch on them. Still, I inspect plants regularly because sometimes it happens that pests get in. Ensure the netting is tightly attached to the raised bed using clips or to the ground, using garden staple stakes or pieces of wood or stones, whatever is available to you.
I found many times during my beginner gardening years that cabbage moths found their way under the netting and still ate all my plants. I also found a few slugs getting in from under the netting. So always inspect the plants, and ensure the netting is tightly attached to the bed to eliminate the way in.
To inspect the plants, always pull the netting away because it is hard to see tiny insects through the netting. Inspect the plants with holes in the leaves as those are indications that pests are present. If I do not see any holes, I do not pull the netting to inspect, but once I start to see holes in the leaves I inspect closely and remove the pests by hand, and dust the affected plants with whatever I have at hand. Many times, it’s just a rock powder like Azomite. It’s a very soft dust and I just use this to dust my affected plants after I remove the pests.
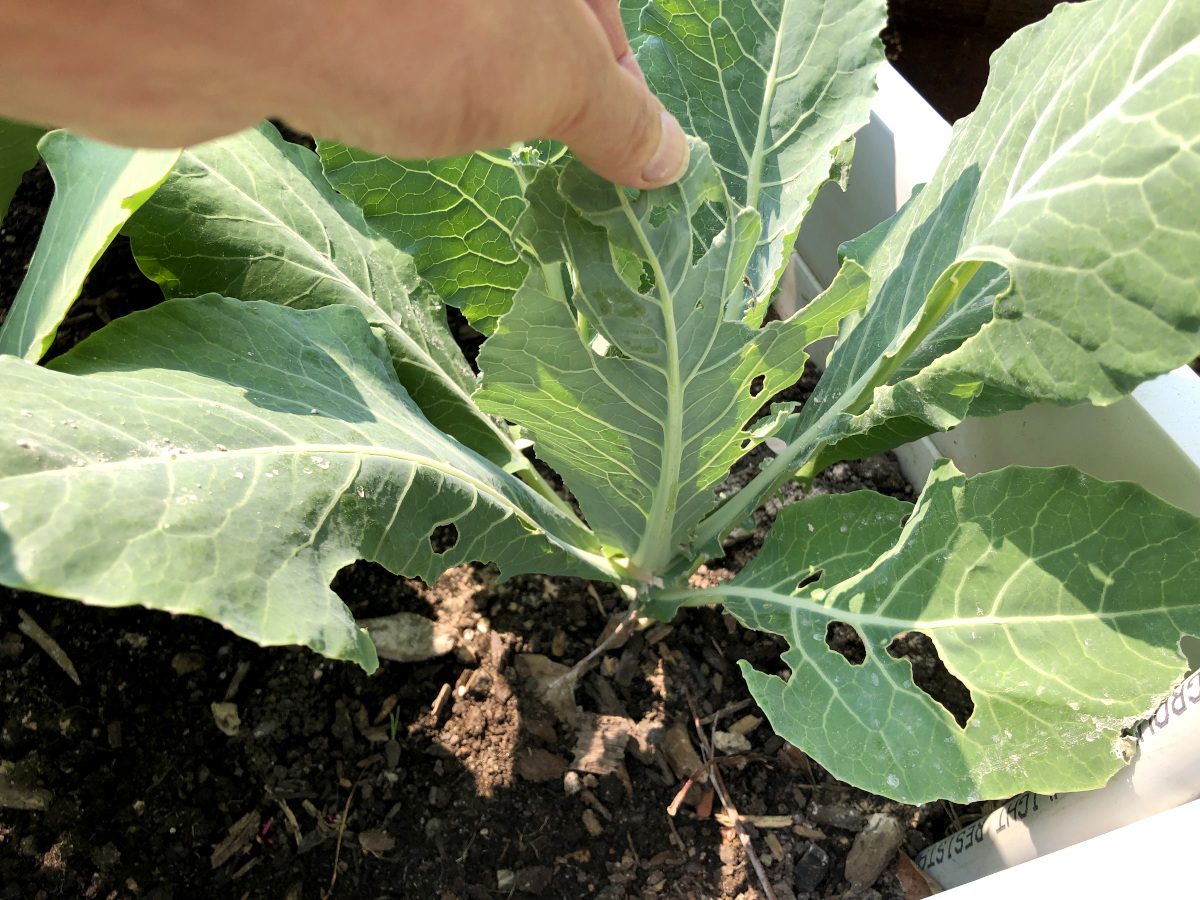
This year, I ensured my nettings are attached to the wooden or plastic garden beds by plastic DIY clips and the ends of the nettings are secured with the rock. I only found one green caterpillar and two little slugs which were immediately removed and plants dusted with Azomite. All my brassicas look very good and each plant started to form heads, which is super exciting!
When to transplant cauliflower seedlings outdoors?
Transplant cauliflower seedlings outdoors about 4 weeks before the last frost date. Cauliflower is a cool-weather crop and likes cooler temperatures. It can also withstand mild frost. Always harden off the seedlings before transplanting them outdoors. Transplants are ready to be planted outdoors once they have 2 sets of true leaves, an extensive root system and have been properly hardened off.
As a general rule, by the time the plant has two sets of true leaves the root system is pretty good to hold the soil it is planted in. It is easy then to pull the seedlings out of the seed tray or a pot just by pulling it by the main stem. The stem is strong and the roots are vast so the seedlings transplant easily.
Once, a novice gardener asked why his soil keeps on falling off of the roots during transplanting. I advised him to wait for the seedlings to have 2 sets of true leaves and for the root system to envelope around 80% of the soil, then the soil will remain intact and will not fall off when handling the young plants.
How to harden off cauliflower seedlings
Start the hardening process by bringing the seedlings outdoors and placing them in a shady spot for about 4 hours. Then increase the hours in the shade each day and slowly introduce sunlight only adding an hour or two each day. Hardening off means helping the seedlings adjust to the outdoor environment, especially to the sun. Introduce seedlings to the direct sun slowly, and tender seedlings’ leaves might get burned if exposed to the harsh sun for prolonged periods.
A GOOD READ: How to harden off seedlings
One of the most important gardening skills that new gardeners will have to learn is to harden off the seedlings. During the hardening process, one will learn to read the plant by inspecting the leaves. If the leaves turn yellow or get brown spots or edges, it is a sign of sunburn. Therefore, it is good to always introduce direct sun very slowly so the leaves can adjust and not get burned. I only expose my tender seedlings to the morning sun first. The morning sun is less harsh than the noon or afternoon sun. Once they can handle the morning sun, I add on the noon sun by an hour or two, then add the afternoon sun. Once they can handle the sun well, they are ready to be transplanted to their permanent spot.
What to do with seedlings burned by the sun
Keep the seedlings burned by the sun in the shade and water thoroughly and deeply at the base of the plant. Keep the plant hydrated and if needed cover the plant with garden shade cloths. Seedlings burned by the sun look droopy, not healthy overall, and have yellow, dry, or brown spots, patches, or edges on leaves. Keep the sun away till the seedlings recover and start to introduce sun slowly again only increasing by an hour or two each day to avoid sunburn.
How to fertilize cauliflower
Fertilize cauliflower plants with fertilizer for vegetables, once they are planted outdoors after about two weeks since transplanting. The best is to follow the instructions on the packaging of the fertilizer of your choice. For slow-release fertilizer it is about once a month for liquid fertilizers it is about biweekly. If the plant is planted in the container it might need to be fertilized more often since the nutrients are washed out quicker than in an in-ground garden bed or raised bed.
This year I use this liquid concentrated fertilizer. I like to use only one fertilizer for my whole garden. This one comes in a 1-gallon bottle and I only use 10 mills for 1 gallon of water. You can mix stronger or gentler fertilizers as you need. So far, it performs very well and I am happy with how my tomatoes, and brassicas including cauliflower look. All plants look happy and I did not notice any burns. I would recommend this fertilizer for home gardens.
Can I grow cauliflower in pots, containers?
Yes, cauliflower is great to be grown in pots and containers. Ensure the pots are at least 12 inches deep and 12 inches wide for 1 plant.
How to water cauliflower
As a rule of thumb, water cauliflower plants with 1 inch of water per week. The best is to water the plants at the base, but cauliflower can handle overhead watering which might be the only way if covered with the netting for protection from pests. Mulching garden beds will help preserve water in the soil and cool down the plants.
How to start a container garden for beginners
I always water my brassicas overhead and only water at the base on the side of the garden bed simply because I have them all covered with netting which stands 2 feet above the plants. Brassicas have thick leaves and handle overhead watering very well. I have no issues with watering and fertilizing them with my recommended fertilizer overhead. They do not show any signs of disease or burns.
A GOOD READ: How and when to water vegetable garden
I have my garden beds mulched so now I only water my gardens about once or twice a week. I always uncover the soil to check for moisture before I decide to water it. If the soil surface under the mulch is moist, I do not water. I wait until about an inch under the soil surface is dry, then I water.
Mulching garden beds help to keep the soil moist tremendously! I cannot stress enough how mulching garden beds will help you with your workload. I only have a medium size garden now, and before mulching, I had to water daily or every other day. It was a tremendous workload for me, especially since my growing space is divided into multiple locations and even elevations.
Mulching is one of my best gardening strategies! It preserves water for such long periods that now I am not overwhelmed by watering anymore. It helps me go for days in between watering.
A GOOD READ: How to mulch garden beds
Can I grow cauliflower in summer?
Cauliflower is a cool-weather plant, is sensitive to warm temperatures, and does not do well in hot weather. Because this delicious vegetable is highly sought-after whole year round, cultivars of this vegetable were cultivated for warmer weather. If you wish to experiment and grow cauliflower in the moderate summer heat, then go for warm-tolerant cultivars like Snow Crown, Amazing, Cheddar, Graffiti, Vitaverde, or Song TJS-65. However, no cauliflower does well in extreme heat and or humid climates until after summer’s heat peaks are passed.
Gardening in zone 6, we do get hot and humid weather for weeks but usually with breaks in between. I might try to experiment this year by planting some of the varieties mentioned above just to see what happens. Should I decide to grow them, I would plant them in more of a shady spot with only morning sun and shade in the afternoon.
What are the best temperatures to grow cauliflower?
Cauliflower grows best in cooler temperatures. Between 60-65 is best, but will tolerate up to 75F. Cauliflower does not tolerate high and hot temperatures when constant.
What is blanching cauliflower and how to do it
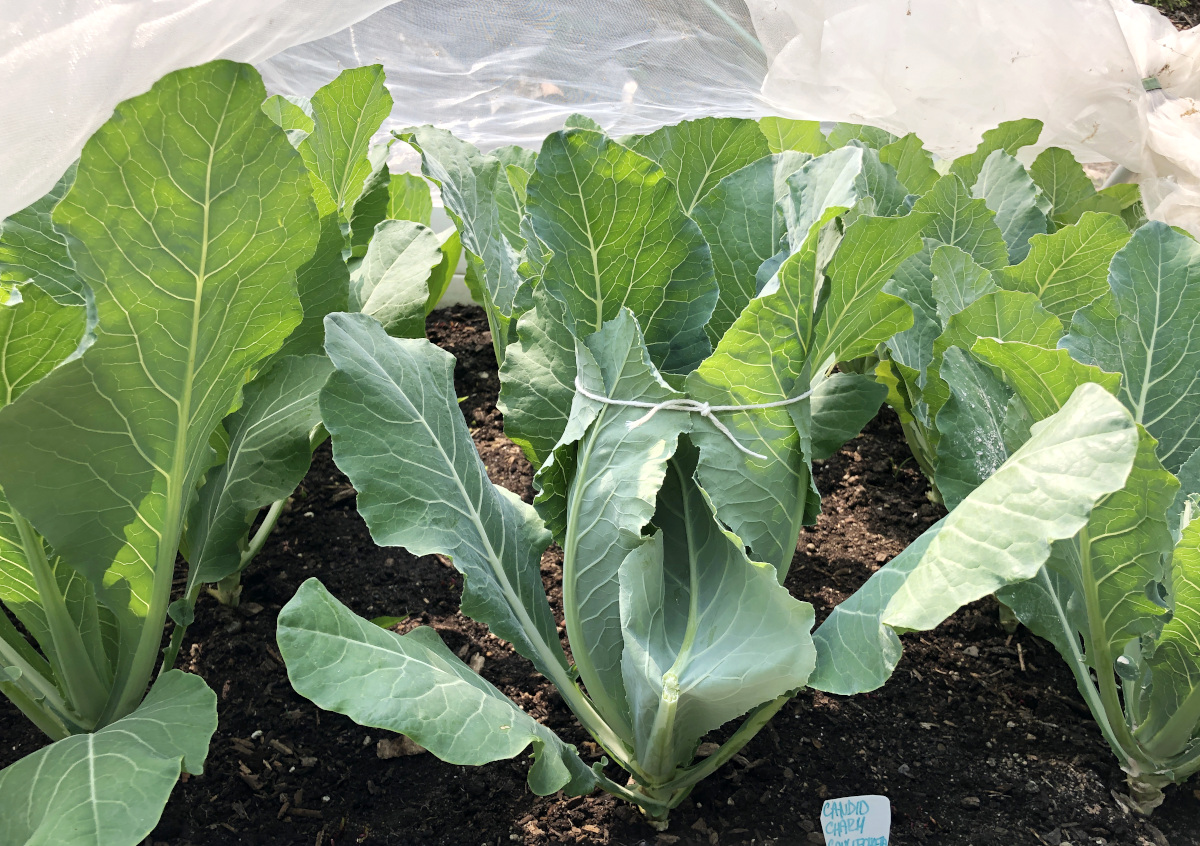
Cauliflower blanching is protecting cauliflower heads from direct harsh sun exposure. Direct harsh sun will turn white heads into greenish or brownish color and the flavor of the cauliflower might turn a little bitter. To blanch cauliflower heads, take large outer leaves and tie them up loosely above the small forming head of the cauliflower to allow airflow but to prevent sun exposure. Another way to blanch the cauliflower plant is to break off the largest leaf and place it on the head to shade it. But tying is more secure. In about 14 days the head should grow into a usable size for harvest.
Can I plant something else with cauliflower?
Yes, you can plant something else with cauliflower. Because cauliflower is a taller plant, there is plenty of space under and around it. You can remove lower leaves and tie up the largest leaves to blanch cauliflower heads at the same time making more space around the plant for other veggies. You can plant root vegetables like beets, carrots, celery, onions, and beans around your cauliflower plants.
I planted beets around my cauliflower. Cauliflower has shallower roots, therefore I like to plant root veggies with plants that have shallow roots because they will not compete for space below the ground. Herbs are also a good choice. I also like to interplant long-maturing vegetables with short-maturing vegetables and herbs around them to make the most of my limited garden space.
How many days does it take for cauliflower to grow?
Cauliflower takes about 60 days to grow depending on the cultivar.
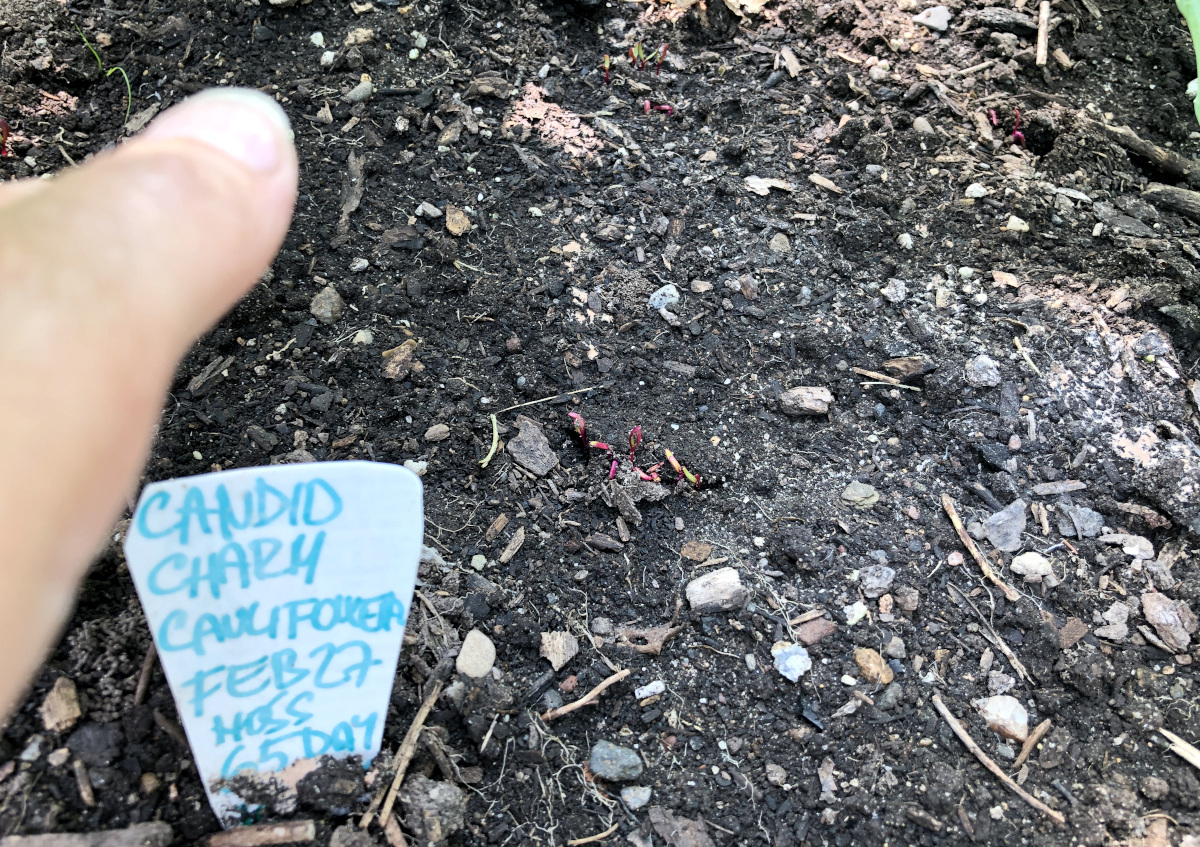
TIP: Well, in my growing zone 6, all the vegetables take more days to grow than what their packing information says. Most of my vegetables take full 30 days more till harvest compares to the packaging information. My 65 days cauliflower takes about 4 months from seed to harvest. I sowed seeds on February 28. Planted seedlings outdoors the first week of April and plan to harvest my first cauliflower head middle of June. That’s about 110 days. It’s a big difference from what the packet information says, and that’s OK. I am sharing this so you know what to expect. I always add 30 more days when I plant to harvest. This is useful information for novice gardeners, so you are not disappointed, but patient. There is nothing wrong with the plant or care you provide; it’s simply how it is for most of us home gardeners as there are many factors that influence the growth and the time the vegetable needs to full maturity.
This year, I am growing Candid Charm cauliflower. It is really a charming plant! The heads are so beautifully uniform and round, it is very satisfying to look at them. The leaves are not too large and they all stand upright rather than spreading sideways creating lots of space to plant around and under them. I am so curious about the taste! In two weeks max we will harvest, I am beyond excited to taste it!
I know cauliflower might be a hard one to grow because of so many pests that it attracts. But once you amend the soil with organic matter, make it airy, fertilize the plants properly, and put a netting armor around it, you will get to finally eat it! Give it a try and focus on 3 things: fertile soil, fertilizing, and proper protection, you will have success. Do not forget to grow this lovely vegetable early in spring and late in fall when the cool temperatures are right.
I would like to hear from others who also like to grow cauliflower about what cultivar is your favorite to grow and why.
When and how to grow zucchini, summer squash
When and how to plant butternut squash
When and how to plant, and harvest spaghetti squash successfully
