
During several years of my gardening endeavor, I started a vegetable garden several times in several different spots. There are certain rules to keep when starting a vegetable garden that will lead you to successful gardening. The key is to follow the key principles while going with what makes sense and would work best for your needs.
To start a vegetable garden, start small, plan your garden in a sunny location, if possible, on a level lot, close to a water source, and close to your house with easy access. You will need to choose the type of gardening whether it will be an inground, raised bed, or a container garden to prepare the layout, then prepare nutritious soil. Choose plants you like to eat and plant those which will also fill your pantry. And be prepared to protect your vegetable garden because pests and diseases will come to visit.
Start small
When starting a vegetable garden, start small if you are a first-time gardener. You are just testing the waters and learning about gardening. Gardening is a lot of planning and lots of hard work, but also very rewarding and relaxing. When you start small you will prevent yourself from being surprised by how much work and effort gardening actually requires. If you find out that you are able to handle a larger garden, you can always expand according to your abilities.
I am always shocked at how parents overwhelm themselves and their families by getting involved in every kind of activity under the earth. Then they complain about how they don’t have time for themselves, for their kids, for anything really, because they are so busy attending every activity possible. Why do they do that to themselves, I always ask. Just cut something out and give yourself time to live. The same goes for gardening. Start small, learn on a small garden and once you learn you are able to handle a larger garden, just add on, no problem there. But if you start with a large garden at once without any or very little prior experience you might soon get overworked, burned out, and overwhelmed with tasks, tending the garden, monitoring plants, fighting pests, harvesting, and so on. Start small, then add on.
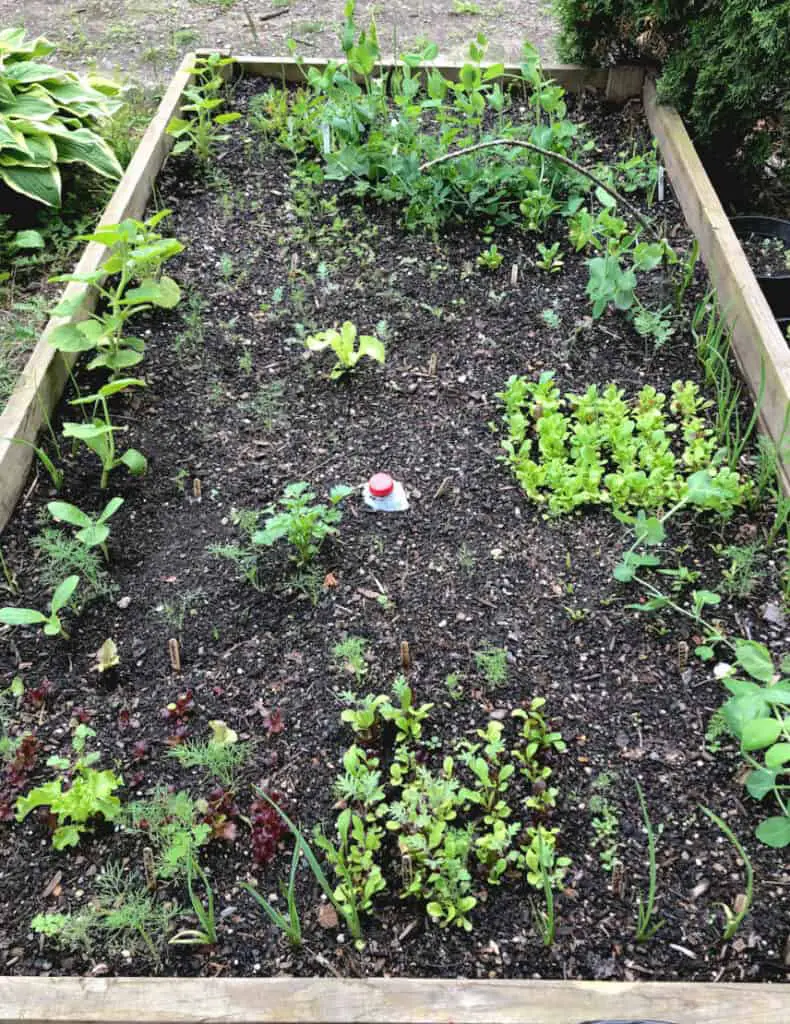
I started with a 4×8 garden bed. I soon learned that I am able to handle two garden beds of the same size, so my husband built one more for me. I fell in love with gardening and the next year we expanded from 2 garden beds to about 4 more. Today I have about 8 raised beds and several inground beds in various locations, I use every square space possible. I love gardening so much that I have covered about 80% of our property with woodchips just so I could plant anywhere I wanted and didn’t have to spend time moving grass.
Plan your vegetable garden
A successful vegetable garden plan must lay in a sunny location, on a level lot, and best close to the water source and your home so it’s easy for you to maintain it. Your vegetable garden should have easy access so you can enter it with bulky tools and get in and out without any obstacles. Ensure your plants will be provided with nutritious and well-draining soil. Last but not least, protect your garden with a fence if possible, or covers, and be ready to fight pests large and small as they will try to eat and live off of your precious plants.
If you need detailed steps on how to plan your vegetable garden, I have you covered! Please visit my detailed guide on “How to plan a vegetable garden.” I believe this step-by-step guide will benefit you greatly and you will be able to implement lots of knowledge when planning your pantry-stocking garden.
Chose a type of gardening right for your
Have you ever thought about the fact that every garden is tailored to the lot we have available and to the gardener who works it? Just think about it. We all own different properties and live in different homes, apartments, and various levels. Each of us has different personalities, grow different plants, and implements different gardening styles. But we have something in coming, we all love to garden and love to provide for our loved ones.
If you already grow a garden, what garden style do you use? Is your garden an inground one? Or do you prefer raised beds? Maybe you grow in containers. I would like to take a walk with you to see what your garden looks like.
There are three best types of gardens that home growers implement in their pantry-stocking gardens. An in-ground garden, a raised bed garden, and a container garden.
An inground garden utilizes native soil and with this type, the plants are grown directly in the ground. This one doesn’t require any building materials, just clear the lot, work and amend the soil and start planting. The in-ground garden is suitable for level lots and has quite good native soil to start with. It is easy to set up and requires minimum to no start costs.
A raised bed garden uses beds made of various materials like wood, metal, rocks, and plastic to name a few. Beds are then filled with your favorite soil and ready to be planted. A raised bed garden is easy to keep weed free and doesn’t require as deep bending as an inground one.
If you have an uneven lot or must work with a slope, a raised bed garden is for you. You can bury the beds in the slope and make them level by partially burying them. That is what I did with mine and it works wonderfully.
A container garden utilizes containers to grow vegetables in. Remember the larger the container the better. Small containers might not be suitable for plants with a larger root system. This garden is also easy to start if you already have some containers available. Make sure your chosen container has draining holes on the bottom so the water can drain well. A container just needs to be filled up with your preferred soil mix and is ready to be planted.
If you want to set up a container garden, read How to start a container garden for beginners for detailed steps and guidance.
The container garden style is most suitable for those who live in rentals, apartments with a balcony, or patio, or if a driveway is the only available space to grow. The great benefit of the container garden is that it can be set up anywhere and, on any surface, as long as the water can drain out of the containers.
Each of these three garden types has its advantages and disadvantages. Learn about each style in detail as well as how to choose the best garden type for you by visiting my article “What is the best type of garden for vegetables?”
Prepare the layout
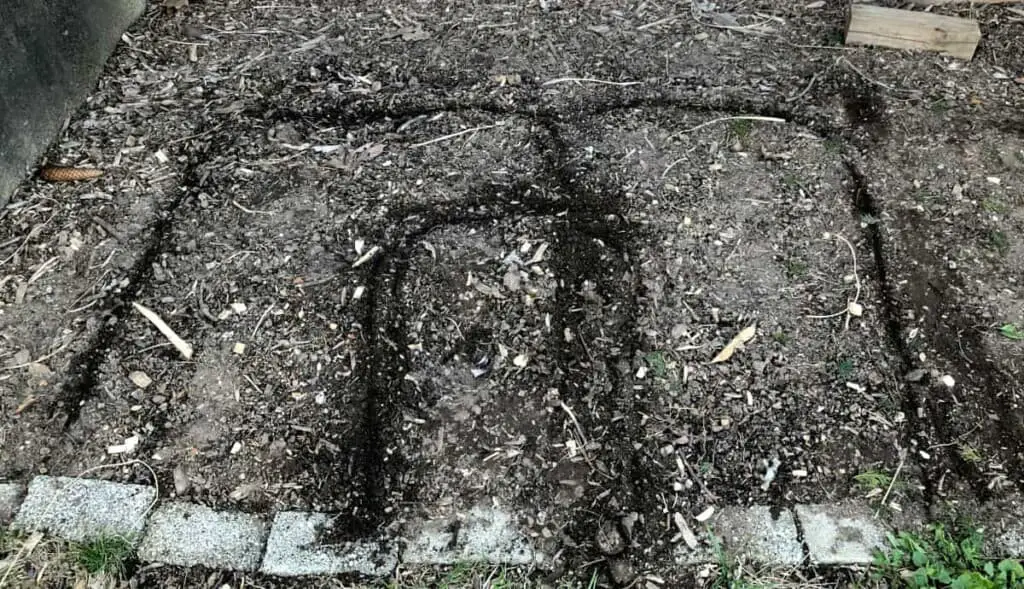
Make your garden layout as simple and easily accessible as possible. Simply take a stick or a hoe and draw or mark where you want your garden beds set. Lay your garden beds or rows from south to north so they can get the most sun possible.
Make sure you have at least 2 feet wide paths between your beds so you can maneuver with bulky tools such as wheelbarrows. Line the paths with wood chips, cardboard, or weed suppressant fabric to keep the weeds down and maintain paths clear and clean. I used newspapers and woodchips to keep my paths weed and mud free.
If you plan to include trees in your garden, they should be planted so they won’t be in your way while not casting a shadow into your garden. In general, tall plants, and trees should be placed on the north side of the lot so they cast shadows out of your lot not inside. But as we all have different conditions to work with just make sure you plant tall plants and trees to cast the least shadow on your lower plants. Plant your tallest plants like climbing beans, peas, corn, and sunflowers, on the north side and then gradually towards the south according to their height from tallest to shortest. This way the tallest plants will be in the back (north) and the shortest plants in the front (south). Planting in such a fashion, the tall plants will not cast a shadow on the short plants and the whole garden will get enough sun throughout the day.
Prepare the soil
Soil is one of the most important components when starting a vegetable garden. All your plants will take most of their nutrition from the soil. Your soil should be full of nutrients, should not be compacted but rather loose and you should be able to stick your finger through it easily. It should drain well so your plants won’t be drawn. It should also hold a good amount of water to support your plants, but water should not sit on top of your soil, rather drain through while leaving your soil moist.
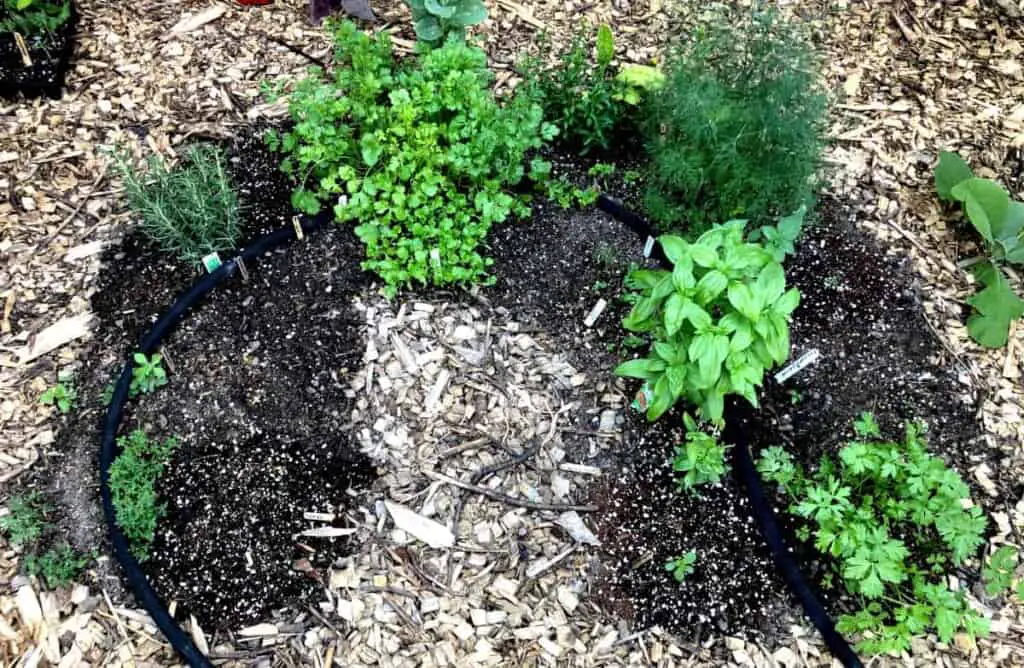
If you talk to 5 cooks, they will all tell you 5 different recipes to prepare the same dish. For us gardeners, it’s the same with the soil. We all have our own favorite recipe for our garden soil. I like to use my native loamy garden soil and mix it with a good amount of organic homemade compost I make in my cold compost pile. If I don’t have enough compost, I buy it at a local garden center. If my plants lack nutrients I like to mulch them with chopped comfrey leaves or spread aged organic chicken manure on top of the beds.
In general, ideal soil should be clear of rocks, sticks should be loose and rich in organic matter like compost or aged manure. When you take your soil into your hand and squeeze, it should hold the shape but then crumble easily with your fingers.
If your soil is not ideal, it can be amended with organic or inorganic amendments. Among organic amendments are compost, aged manure, wood ash, leaf mold, peat moss, or coco coir. Inorganic amendments are perlite, sand, vermiculture, and lime.
Grow what you like to eat
This is one of those pieces of advice that we hear often as beginners but we like to go astray and plant something that sounds so exciting to us. I like the look of black eggplant, the look of lots of green beans but we don’t like to eat them in our house. Non the less I planted lots of green beans and when they were ready to be harvested, I thought to myself, nobody will eat them when I cook them. Now what? They all ended up in our compost pile. This happened the first year I planted them and the second year too. Yes, I didn’t learn that I should only grow what we like to eat. I planted them the second year again because they are just so prolific and so easy to grow. They don’t require lots of baby stilling as I call it. They are just such great vegetables to grow. Yes, they are great to grow, that’s all in our house. We do not eat them. So, no matter how prolific the vegetable is, or how great it looks, or how easy it is to grow, if your family members don’t eat it, do not plant it. My green beans occupied our garden bed for several months of the growing season and in the end, I had no use for them. So, I learned, that instead of planting something we don’t eat that will occupy precious growing space, taking water and my effort and time, I should rather plant something that we actually will eat at the end of it all.
Make a list of what your family likes to eat and grow that. You can stretch your list of produce to grow but slowly and only so much that would not take away from your main pantry stocking plants.
How to find out what exactly our family members like to eat is very easy. Just go through the meals you serve your family the most and deconstruct the meal. Find what in that meal was made of vegetables and you got the list started. For example, if you like to make pizza or tomato sauce for your pasta, just look at the ingredients written on the label on the bottle where your sauce came from. All the veggies are listed there.
Another way to find out what should be on your pantry stocking garden list is to go through your shopping bags. What do you buy at the store the most? What do you spend most on? Is it cucumbers, green salad, tomatoes, or carrots? Your list should include vegetables you buy at the store because this is what you enjoy eating.
Chose plants that will stock your pantry
Not every veggie is fit for a pantry stocking garden. Some vegetables are difficult to preserve, and others are very easy to simply store on the shelves. I would recommend when starting to plant your pantry-stocking garden after you made the list of your favorite veggies go through it again and highlight veggies that are:
- easy to grow
- don’t require lots of maintenance and pest protection
- are prolific and provide plenty to harvest
- are easy to store and preserve.
Those veggies are winners and should be your pantry staple garden musts.
For example, I enjoy growing butternut and spaghetti pumpkins. They are very easy to sprout from seed. Pumpkin seeds can be planted directly in the soil. They don’t require much babysitting, attention or pest protection in my area. They grow almost by themselves and they fruit large fruit that is at least 1.5 pounds heavy. Each plant produces at least 2 pumpkins so you can at least 3 pounds of food per plant. On top of it, they are super easy to store. After I harvest them I let them cure (harden) in the sun for about 1-2 weeks for the skit to thicken and toughen and then I just place them on the shelf in the basement. They can last me up to 12 months! I don’t have to can them, freeze them, or preserve them in any special way. I love to grow them. They are so easy to grow and store, and they taste amazing!
On the other hand, growing peas is a totally different game. You need lots of space to grow them, pea plant needs vertical support. You need tons and tons of pea plants which will occupy a large space of the growing space just to harvest a tiny amount of produce. Peas need to be also protected from birds, chipmunks, squirrels, and rabbits in my area. They require much protection in my area, take up a large portion of garden space, and harvest is not enough to feed one person for one meal. Even though I love to eat fresh peas, I don’t have them on my list as a main pantry stocking vegetable because they do not provide abundant harvest and all of the hard work I mentioned above. Pea is therefore just an extra veggie that we grow on the side and if I have no space for it, I don’t grow it, because it’s not worth all the effort.
So chose to grow vegetables that are worth it.
Be ready for pests and diseases
Each gardener fights pests. If you meet someone who tries to convince you they don’t have any pests, I would not believe them.
In my growing zone 6, I find all kinds of pests from black bears, deer, and chipmunks, to cucumber beetles and cabbage moths.
Do not think for a moment that you are the only one who likes certain vegetables. throughout my gardening journey, I learned that every vegetable has its pest who like to munch on them as much as you do if not more.
I grew up in Europe and my dear mother grew cucumbers every year. I have never heard of a cucumber beetle until I grew my own cucumbers here in the USA. I thought cucumbers will be so easy to grow! I have never heard of any pests like them, but I have heard that people have lots of harvest from them. Wow, a winner veg! Well, until I planted them myself here in my growing zone 6 in the USA. As soon as they put on flowers, yellow beetles with strips, and yellow beetles with black dots showed up and they were literary killing my cucumber plants. What on earth is that? Well, I thought squash borers were the nastiest garden pests until I planted cucumbers and learned there is a pest for them too, and they even beat the squash borers in how fast they were to execute my cucumber plants!
So be ready and know that there is a pest for every plant. The sooner you accept it, the less pain you will feel when you find them munching on the plant you put so much effort into.
The very first thing you should do to protect your garden is to put up a garden fence. As I said I have deer and black bears in my area. It’s hard to build a high enough and strong enough fence around here and it’s pricy. I wasn’t able to put a sufficient fence around my garden, so what I did instead is to set up motion activated water sprinkler. The sprinkler helps me to scare large wildlife away.
I also use plant covers and netting for my crop to protect it. Brassicas and leafy plants are covered with a netting through the whole growing season to be safe from cabbage moths and wild rabbits.
For the tiniest pests like aphids and small bugs, I use a mix of water, baking soda, peppermint oil, and a few drops of dish detergent and spray them. I also often go and pick especially cucumber bugs by hand.
For chipmunks, I haven’t found anything more effective than a trap.
Count on the fact that you will lose every year a number of plants and with them also some amount of harvest, therefore always plant more than you think you need. I always plant at least 15% more plants than I plan to harvest to count with losses.
I hope this “how to start a vegetable garden” guide will be helpful to you and your garden will not only grow but will be managed to a successful harvest by you. Good luck gardening!
How do I start a pantry-stocking garden?
How to prepare a vegetable garden layout
