
I have built several no-till gardens in my pantry-filling garden, in fact, I transferred almost 80% of the property into a no-till garden to give myself the freedom to plant wherever I needed to in case I run out of garden space. Allow me to share my experience with you in this step-by-step article on how to build a no-till garden for beginners.
To build a no-till garden for beginners
- Select a proper location for a no-till garden
- Prepare your garden supplies and garden tools
- Plan your garden and draw a layout on the paper
- Measure your garden
- Prepare the area
- Construct a no-till garden bed
- Install a fence if choose to fence the garden in
- Plant in blocks rather than in rows to save space
- Sow seeds and plant seedlings
- Water your no-till garden thoroughly
- Care for your no-till garden and plants
How to select a location for a no-till garden
Selecting a location that gets the most sunshine during the day is the best option. Most fruit and vegetables need at least 6 hours of sun, therefore take a look at your property and select a location that gets the most sun, the more sun the better. The location should be level, it should drain well, and should not trap any water to hold for days. Locate objects around the garden location if there are any and watch where they cast any shadow that would shade your plants. The best is to choose a location that is close to a water source which will make it easy on you to water your plants. The location should be close to your dwelling to make it easy on you to tend to your garden.
Related: How to start a vegetable garden, How small garden to start with?
What supplies are needed to construct a no-till garden
To construct a no-till garden you will need:
- Cartons or newspapers as a decomposable barrier between the surface of the ground and the soil you will plant in
- Garden rake
- Garden shovel
- The soil of your choice, soil amendments
- Mulch if you choose to mulch the garden
- Watering can, watering hose
- Gardening gloves
- Wheelbarrow
Other useful gardening tools you might need include a garden hoe, garden trowel, fence if you plan to fence your garden, kneeling pad, soil scoop, plant label, seeds, and seedlings.
Measure your growing space
Once you know how much space you have it is easy to plan, even if planning on the paper first. Measure the garden’s perimeter, length, and width. Multiply the length by the width and you get the square footage of your garden space. Most garden rows are about 3 feet wide with about 2 feet wide paths between the beds. A 3 feet wide no-till garden bed is wide enough to accommodate even the largest plans but still narrow enough for the gardeners to be able to reach the opposite side of the bed when weeding, harvesting, and such. Knowing the perimeter of the garden space will allow you to know exactly how much of fencing you will need to close your garden in.
How to plan a no-till garden
If you are setting up a garden for the very first time it is best to plan on paper. Draw your garden layout on paper. The gardens are usually rectangular or square in shape. Draw the garden beds, and any other garden areas and items you would like to have in your garden such as a shed, composting bin, composting station, greenhouse, and such.
Related: How to plan a vegetable garden
If you just visualize your garden place you might miss something, but if you draw it on paper, it is easy to see where will fit what. It is easy to also move things while they are on paper than once they are placed in a real garden. A no-till garden is hard to move once the no-till garden beds are placed in. You can take as much time planning and adjusting things as needed while things are on paper. The layout of your garden might even change multiple times once you start to construct your growing space. Be open-minded once you start to construct, if the things need to move around for the good of the growing space, then do not be afraid to move them.
How to prepare the area for a no-till garden
Clear the area of all the debris and obstacles, and if needed clear the trees and bushes. Ensure the space is clear and accessible for you to work and maneuver.
How to construct a no-till garden bed
Preparing the area for a no-till garden is relatively easy to do. A no-till garden is an instant garden, easy and quick to set up and plant.
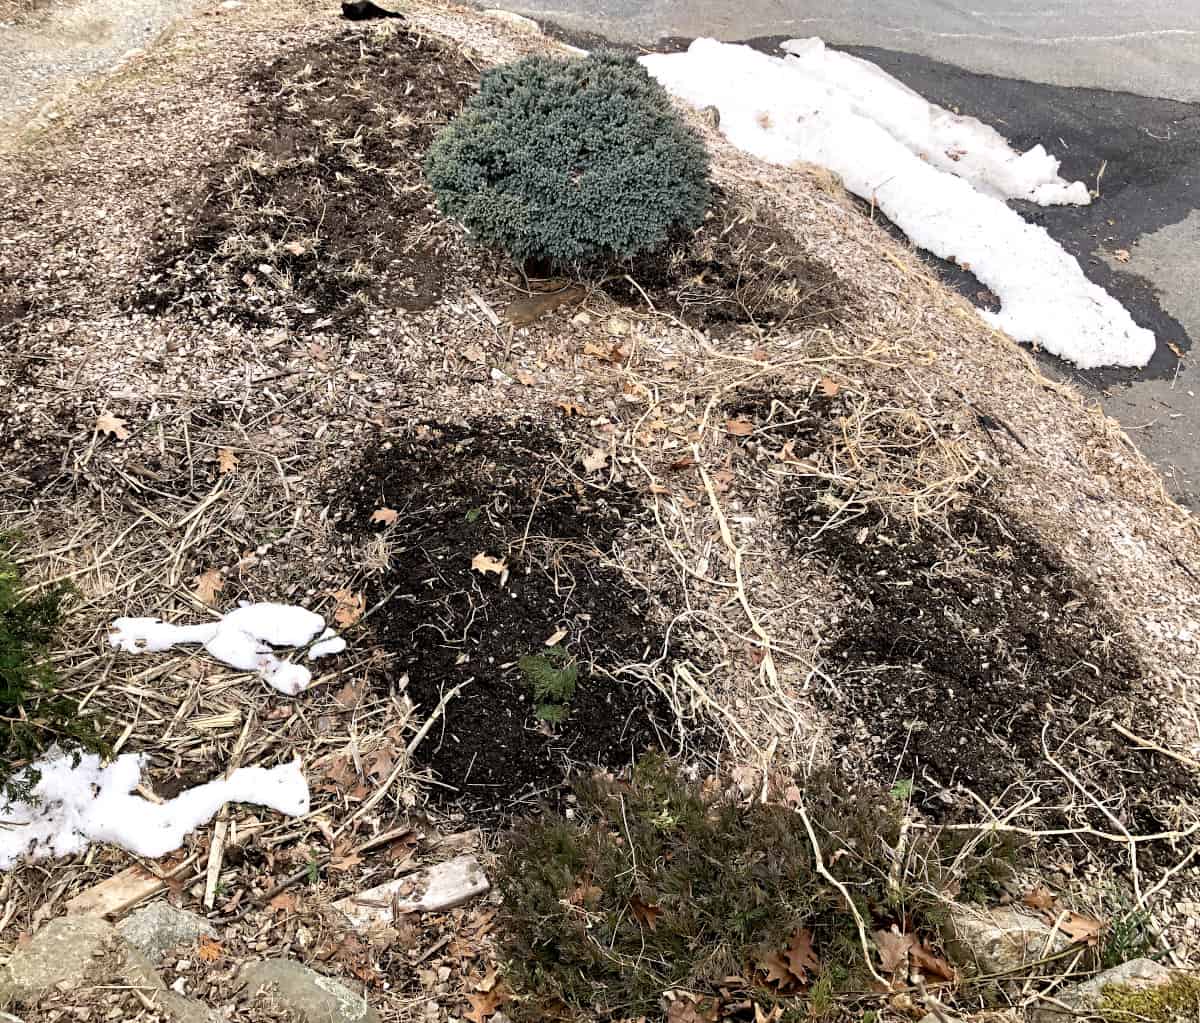
- In the area of a garden bed lay down cardboard paper, or newspapers at least of 5 layers thick. Cardboard and layered newspapers will act as a weed/grass barrier between the existing surface of the ground and the good soil where you will plant your plants in. Over time the weeds or grass under the cardboard or newspapers will decompose along with the cardboard and newspapers. These will also provide a nice compost for your garden. Ensure the weed barrier overlaps and no gaps are left in between. Worms like cardboard, the root system will eventually grow into it and it decays relatively quickly.
- On top of the barrier layer at least 6 inches of compost. Since in my area it is not easy to find good compost and I like to make my garden more cost-effective, I like to layer first 3 inches of not-so-expensive garden soil, then about 3 inches of compost. If you cannot afford compost or cannot find it, then layer 6 inches of potting mix.
- Set the garden in a place with a thick layer of wood chips which will edge in our no-till garden and serve as a path between the beds.
- Plant your seeds, seedlings
- Water your garden
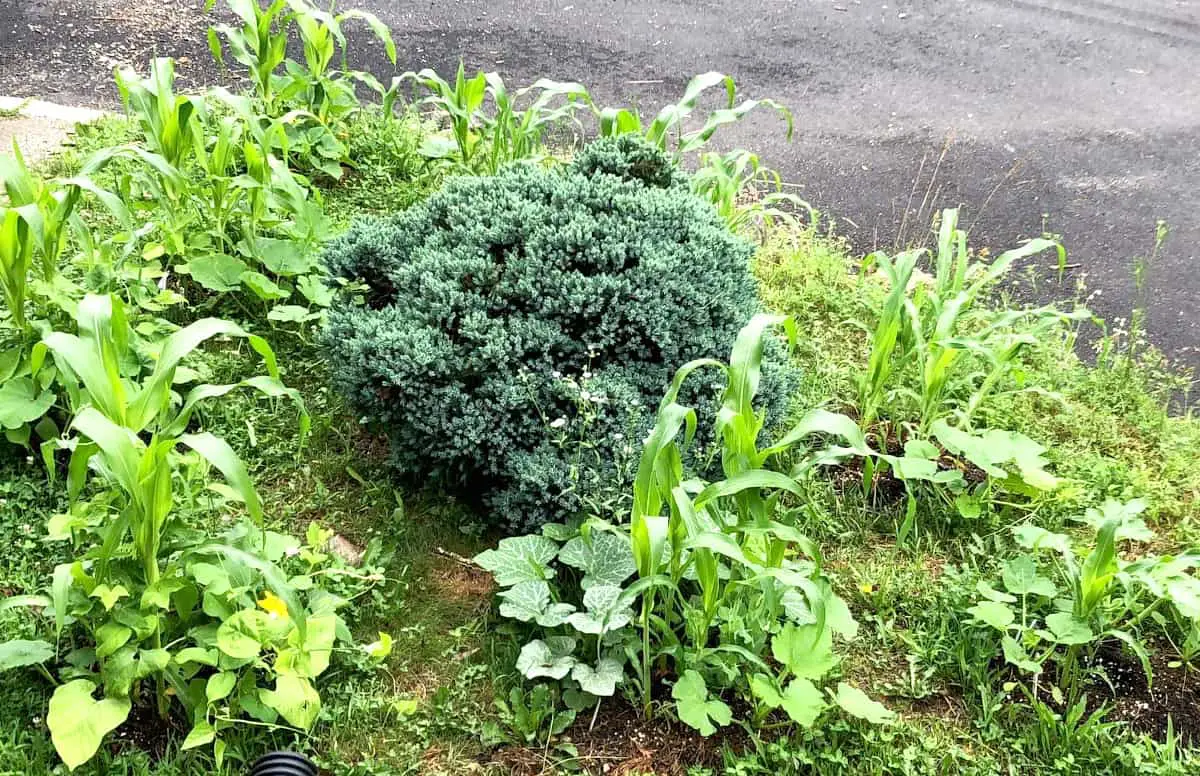
This is in my opinion, a no-till garden is the easiest garden to set up and the least expensive as well. I fact I covered most of my property with wood chips and as it decomposes, I can just dig in and pant, no weeds to fight, and easy to set up a no-till garden bed just by layering a 6-inch of soil/compost.
How to install a garden fence
When choosing a garden fence, know the wildlife and pests in your local area. Erect a fence that is practical and effective to protect your garden. The most common fence used in home gardens is a vinyl-coated garden fence wire tied to metal fence posts. Burry metal fence posts in the ground at least one foot down. Attach garden fence wire to the posts using metal fasteners or zip ties. It is easy to attach the wire to the posts since posts have hooks on their sides. For the best protection and effectiveness of your fence bend the lower one foot of the fence to an L shape, so the one-foot stays lying on the ground while the rest of the fence is erected. The one foot of laying fence on the ground is to create a barrier for the pests that might dig under the fence and enter through the hole underneath. You can choose to mulch the one-foot wire barrier with wood chips. Some gardeners choose to even burry down part of the fence as a barrier to combat groundhogs, and any animals that like to dig underwires.
How to plant in a no-till garden
Planting and sowing in a no-till garden is the same as planting in any other garden. Simply make a hole as deep as the pot in which your seedling sits now, using a dibber or a garden trowel. Place the seedling plug in the hole and cover the hole with soil. Water thoroughly. Do not plant the seedlings too deep because it might cause the soil to cover the node and when you water the soil will keep moisture in the node. The node might rot and the plant dies. Leave a node a little bit above the surface, do not cover it.
There are plants that you can however bury because they send the roots along the whole stem. They are called vining plants. Vining vegetables that can be buried deeper to give more support to the plant are tomatoes, zucchini, and pumpkins.
If planting a seedling for the first time and need a little guidance, I invite you to visit my article When and how to plant a seedling! After reading the article, you will have enough confidence to do it the right way.
Always label your newly planted seedlings and the seeds you sow. Read our readers’ favorite Why to label plants in garden and how to label them. I do not spend a dime for labels anymore, I make my own! It is very easy to make plant labels and you will never ever run out of them again. Learn from me how to make free plant labels in the article with detailed photo instructions: How to make your own free DIY plant labels and why.
TIP: Save leggy seedlings. In some cases, leggy seedlings might be saved by planting them a bit deeper to give them extra support. Sometimes this might work and sometimes the buried part of the stem might rot. But it is worth it to give it a try to save the plant and the time put into them. Make sure next time your plants have more light during their growth as seedlings. Leggy seedlings indicate they didn’t have enough strength of light. Next round you sow seeds, lower your grow lights closer to the already germinated seeds to encourage the seedlings to grow shorter but sturdier. If growing without grow lights, find a better spot for your germinated seeds where they could get sufficient light. If you want to grow lights but can’t afford them, ask your family and friends to gift them to you for your birthday, or Christmas instead other gifts. I got all my grow lights as gifts for my birthday and Christmas. If gifting your grow lights is not an option, then look around social networks to buy grow lights at a discounted price. Or get cheap lights, there are lights for every budget. Make sure the light is very bright, somewhere between 1500-200 Lumens, and the color temperature somewhere between 4500-6500 Kelvin. Find these two important numbers on the box of any lights, it does not have to say a ‘grow light’ on the box, but if the information says they have lumens and kelvins you need they will be fine. The con is that they will only cover a small growing area. I would encourage you to look up the internet, and you will for sure find the right lights for the right price for you. As for me, after a failure of a cheap setup, I just asked my husband to gift me good quality, one proper grow light for Christmas instead of anything else. Then I asked him to gift me another 2 grow lights for my birthday. I only have 3 grow lights but am very happy with them! I am a grower on a budget, but some things just can’t be avoided and have to be paid for. Things like grow lights for example. Having a very small indoor space to grow my seedlings, and no sunny windows, I have no option but good quality grow lights. You buy them only once and they should serve you for years. If paying for something, then pay for something worth it, or find a way someone else would pay for it and gift it to you.
TIP: You can save a zucchini plant that is being destroyed by a vine borer by burying the healthy part of the stem in the ground to send out roots. You can dig a hole and cover a stem in it, or just take soil and mount it over the healthy part of the stem, and water well. Keep it moist to encourage root growth. Once the roots are set, cut off the part where the vine borer is located and throw it away or into your compost pile. You will basically have the old plant with new roots and it has a great chance to survive. This must be done very early, as soon as you spot a sign of a vine borer. The sooner it is done the more chance the plant has. Like this, you can save a well-fruiting plant.
What is a node of the plant?
The node is an area on the stem where buds are located and leaves grow out. Keep the node above the surface of the ground, and do not bury it.
How to water a no-till garden thoroughly
Water your no-till garden thoroughly at least 2-3 times a week, providing your garden space with 1 inch of water. Water your plants at the base and water them deeply. If plants are watered at the base, water is delivered correctly right to the roots. Avoid watering overhead as overhead watering will mostly fall on the foliage of the plant which will distribute water out and away from the plant. Before you water a garden, feel the soil with your finger pushed into the soil. If the soil around your finger feels dry it is time to water. If you feel moisture around your finger, do not water.
I have written an extensive article about watering a garden. In it, I talk about how and when to water a garden, what it means to give 1 inch of water a week, how can you use less water in your garden, and much more! Please read How and when to water a vegetable garden.
Other blog posts related to watering that might interest you are When you should not water your garden, and Should you water garden in the morning or at night.
How to care for a no-till garden and plants
A no-till garden is a garden that is mulched regularly with organic matter like compost. I also mulch my gardens in spring with woodchips, just spread on top of the soil. Eventually, the wood chips rot away and provide some fertilization. Never mix woodchips with the soil. Just layer them on top. If a no-till garden is mulched well with organic matter, the mulch keeps a no-till garden bed from erosion, it suppresses weeds, keeps the moisture locked in, and prevents the scorching of the soil surface by the sun. As the mulch rots away, it also improves the structure of the soil without the need to dig or till. Care for your plants as instructed on the seed packaging or on plant labels that come with the seedlings. Water and fertilizer regularly, Inspect often for pests and plant disease. Remove the diseased plants or foliage and spray for invasive pests or handpick the ones that can be handpicked. Harvest, eat, fill your pantry, and enjoy the rewards of your hard work.
A no-till garden is a perfect option for areas with clay soil, heavy soil, or poor soil.
No-till garden benefits
- Drains well
- Quick to set up
- Eliminates weeds well, very few weeds
- Increases soil biological activity
- Increases soil organic matter
- Less labor to set up
- Easy and affordable to set up
- Relatively easy to care for and maintain
- Provides great gardening space for places with poor, heavy, or clay soil
No-till garden cons
- Requires lots of organic matter such as compost to be laid on top each year which might add up to the cost
- It might get labor intense at least once a year when an organic matter needs to be spread on top of the soil to add nutrition, height, and structure
- Needs at least 6 inches of organic matter or more to be put on top of the ground to provide enough depth for the plants to grow
- If not mulch around the bed it can cause erosion of the beds
My no-till garden is not a 100 % no-dig, no-till, there is a time to dig or till if needed. I do not turn over my gardens because now they do not need to be turned. However, I do not keep my no-till garden beds completely without digging into them. I dig in when o plant potatoes when I harvest them. I dig when I plant new seedlings, I dig when I dig out weeds with strong roots like dandelion or grass, and I dig when I feel I need to loosen the soil. Many times, I see gardeners, especially inexperienced ones, or those who are boxed in their minds or philosophy to argue if a no-till garden should be tilled. Well, if the ground is compacted or you have a good reason to till it, then till it to loosen it up, to solve the problem, to help speed up solving the problem. Do what you have to do to improve the soil for the plants. Try to think out of the box. The gardening rules and philosophies are to guide us and advise us in our gardening endeavor, not to box us in, not to tie our hands and stop us from our own thinking. Each garden is unique, each garden requires a different approach and even each gardener is different and gardens in a different way. Please do not be surprised when you find several different answers to one question or even answers that contradict. They all might be right for that specific growing space. Use your common sense, think, and do what works best for you and your garden.
If you have no-till garden beds in your garden, please share what you like about a no-till garden to inspire those who are still thinking about setting one up!
What is the best type of garden for vegetables?
How to build an in-ground garden for beginners
How to start a container garden for beginners
Vegetables that need very little space
Most high-yielding fruits and vegetables to grow in pantry stocking garden
