
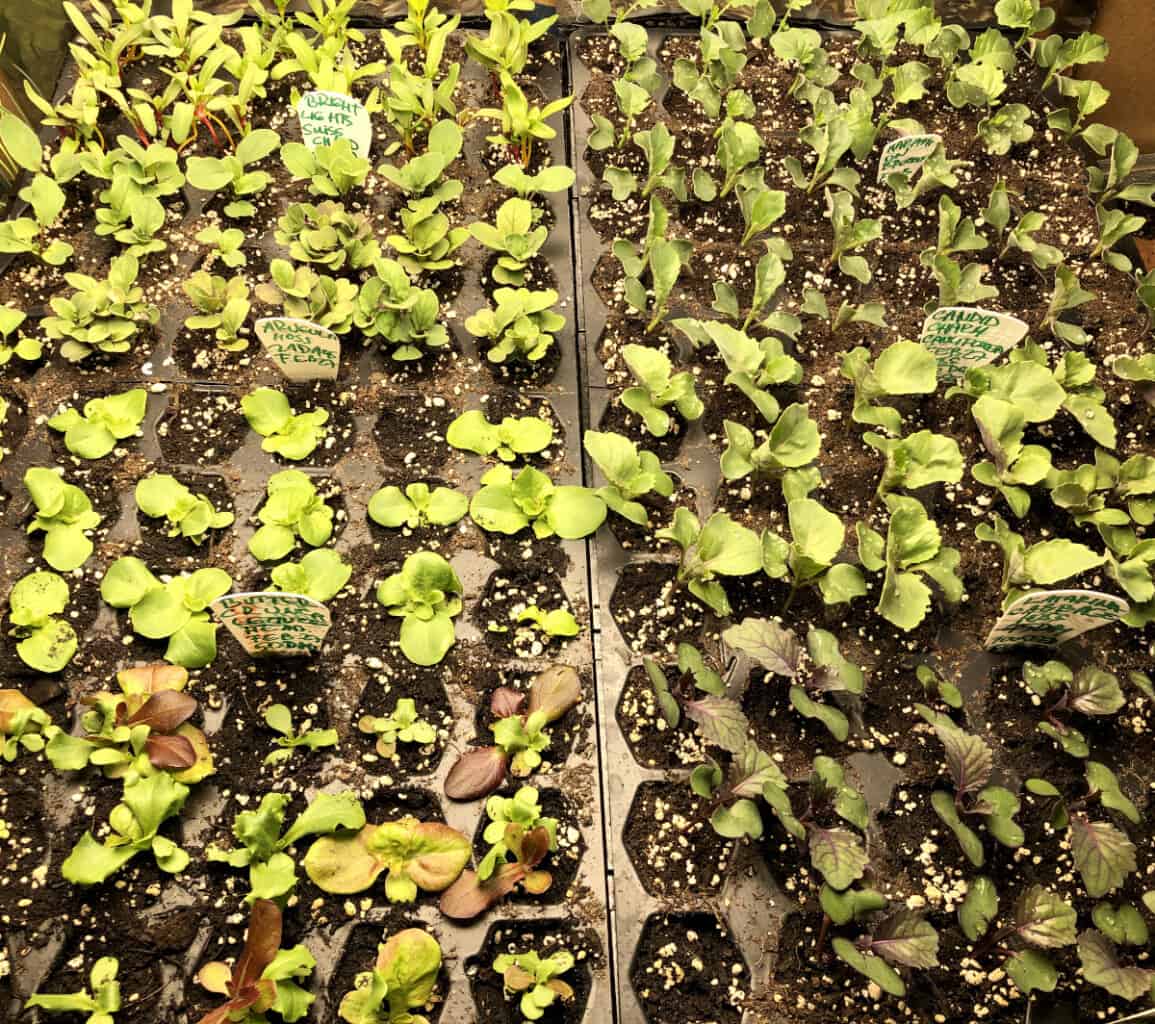
Easy vegetables to start from seed indoors include cool-weather crops like broccoli, cabbage, cauliflower, arugula, kale, kohlrabi, collards, Swiss chard, brussels sprouts, onions, lettuce, and leafy greens. These are some of the most popular cool crops to start indoors. Other easy vegetables to start from seed indoors include warm-weather crops such as tomatoes, peppers, cucumbers, zucchini, and winter squash.
Because each plant can have a different recommendation for when to start them from seeds indoors, it is best to know the last frost date in your hardiness zone. Usually, the packaging the seeds came in has planting information on the back. Read the recommended planting dates as a guideline. In general, the rule of thumb is to start seeds indoors 4-6 weeks before the last frost date in your area. Different hardiness zones have different frost dates and therefore different planting dates.
The seeds of the cool-weather crops are the first to be started indoors. They are then planted as seedlings outdoors several weeks before the last frost date. While seeds of the warm-season crops are to be started a few weeks indoors after the cool-weather crops. Warm-weather crops are then planted outdoors after the last frost date when the soil is warmed up and the danger of the frost is over.
Learn here about what is a hardiness zone, and how to find out hardiness zone for your location, in my article What do hardiness zones mean and how to determine yours.
If you are growing in zone 6 like me, learn what you can plant in your zone in March at What to sow in March in zone 6.
You might also read different articles about starting seeds indoors and they all might have different sowing times. It is because each gardener works with different indoor temperatures and different grow lights. Some gardeners do not use grow lights but a sunny location like a sunniest windowsill. The warmer the environment for the seed to germinate, the faster it germinates. Different seeds require better temperatures (and moisture) to germinate. If it environment is cool they germinate slower. If the temperature is ideal for a certain seed they germinate faster than in cooler temperatures. How fast then the seedling grows also depends on the light. The better grow light, the faster the seedling grows. It might take longer for the seedling to grow when grown under lower light intensity or lower hours of light.
For example, I grew seedlings under a lower quality of light and my seedlings took time to grow, and most of them even struggled to grow and became stunted. Now I have a very good quality grow light and I can see my seedlings grow very fast and strong because they are provided long hours of adequate light. The light and the temperature of the soil and environment are key. Read the seed packaging and what temperature your plant requires to grow well.
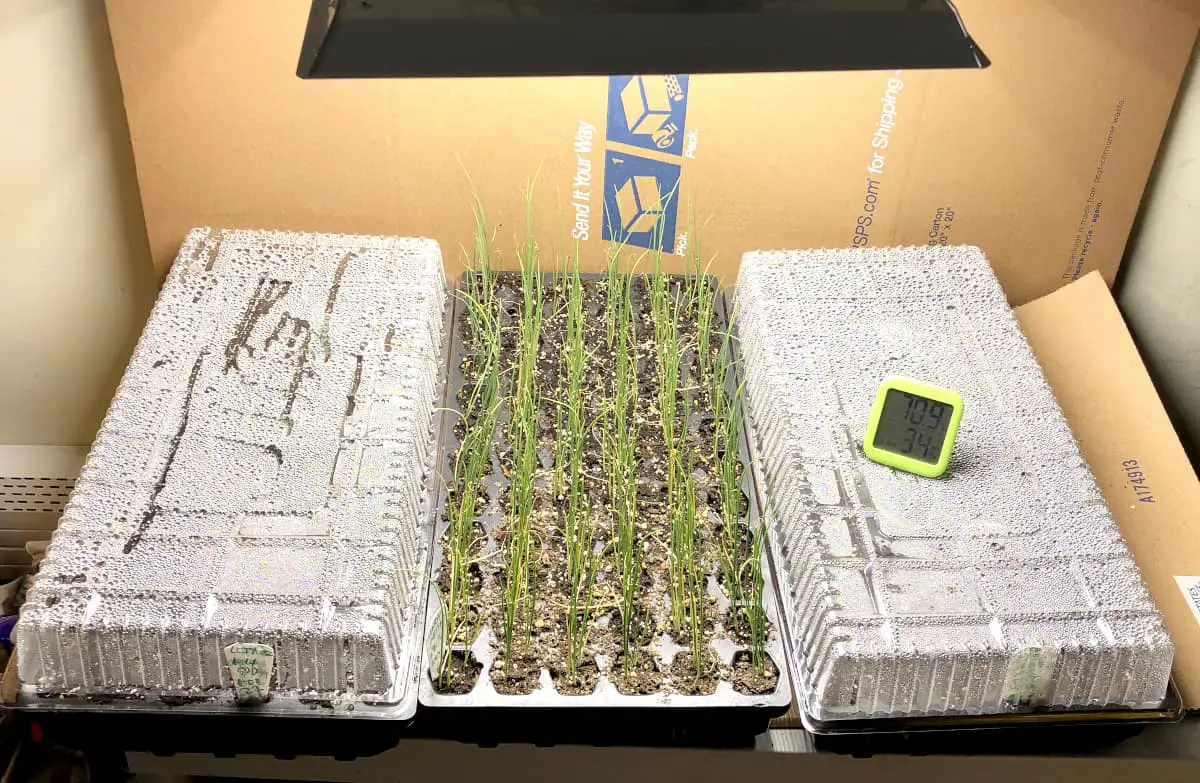
I grow my seedlings under Mars Hydro TS 1000 full spectrum dimmable 150W LED grow light and am happy so far with how fast and healthy my seedlings grow. It is my first grow light and I am very happy with it. At first, I only got one but about 6 weeks into growing my seedlings, I got two more to expand because I like how great my seedlings grow under these lights. There are many options to grow lights. I started with the cheapest option and ended up in disaster. Then I got the grow lights I use now and I will never go back to bad quality lights; it is not worth it.
When to sow cool-weather vegetables indoors
Sow cool-weather vegetables indoors about 10-12 weeks before your last frost date, so they are ready to be planted outdoors around 4-6 weeks before that last frost.
When to sow warm-weather vegetables indoors
Sow warm-weather vegetables indoors about 6-8 weeks before the last frost date, so they are ready to be planted outdoors after your last frost date.
What seed starting supplies are needed
- Seeds
- Seed starting medium such as seed starting mix, compost, or potting mix
- Containers to start seeds in
- labels (optional if marking the sowed seed by writing directly on containers)
- Heat
- Light
- Water.
How to choose the best seeds for starting seeds indoors
Starting the seeds with the best quality seeds is one of the most important steps. Ask local gardeners in your area what seed company they use to start seeds indoors. Ask for recommendations in person, in local gardening groups, or in local social media groups. Eventually, you might start saving your own seeds. If you do not know where to start and have no one around to advise you, then I would recommend buying from well-known seed companies that have been around for a long time. Another option is to get online, watch videos and read gardening blogs and observe, listen to where other successful gardeners get their seeds. As a beginner gardener, I bought my seeds from local stores, garden centers, and even dollar stores. And they worked well. One year I got a whole bag of seeds from a local lady who decided to give the full bag of seeds away because the dates on the seeds were expired and she wasn’t about to use them. I was overjoyed! I had no problem with the date being expired knowing that thousands of years old seeds have successfully germinated. I took the bag with thanks and was happy to sow the seeds, they were great. Look around and start with what is available locally, then as your garden and educate yourself more, look for a company that has good reviews, and good ravings and try their seeds. Now I like to save my own seeds, not for all my vegetables but many of them yes.
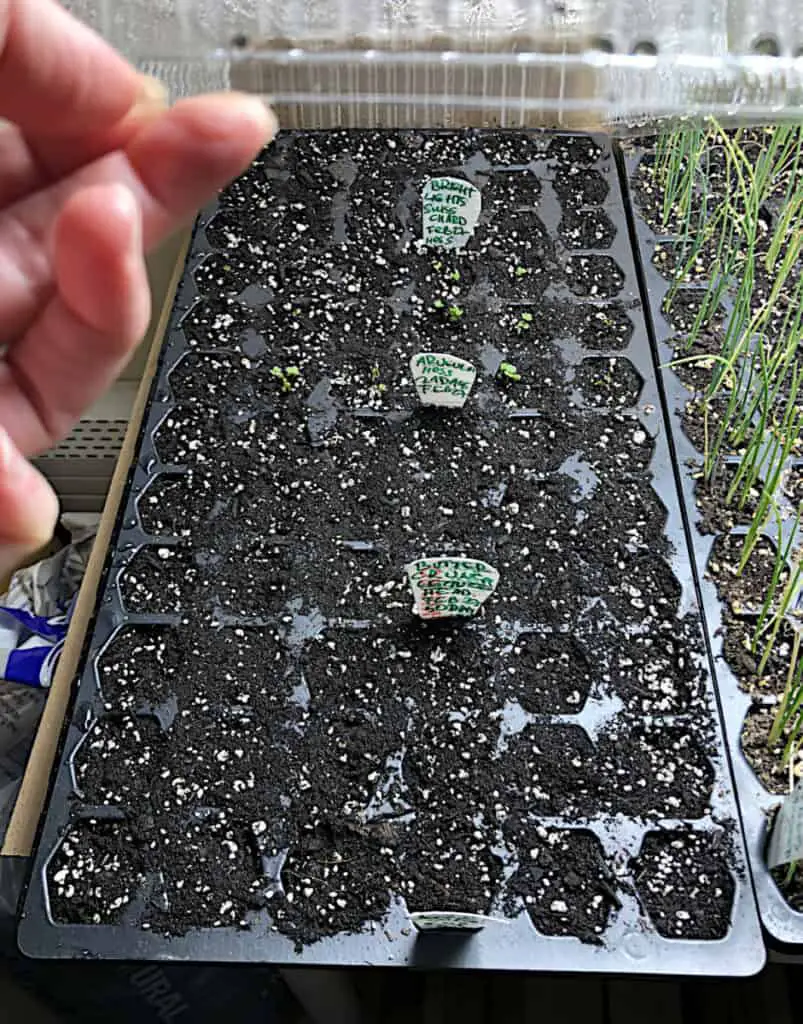
Last year I purchased the seeds from a certain seed company and ended up very disappointed because the seeds had little germination and the growth of the plants was slower and not as strong as I expected. I obviously will not buy from that company again because of what experience I had during the whole season. It might have been my fault partially because I didn’t have the best setup. On the other hand, I think I even started their seeds by direct seeding and I was not impressed eighter. It was simply a miss for me. Then I went online and searched what other gardeners had to say about the companies where they got their seeds from. I have found one gardener I respect and she was very happy with a particular seed company she purchased from the very first time. She shared her surprise at how well the seeds germinated and how healthy the plants she had were. She also mentioned that she is switching from her previous seed source to this new one. So, this year following her advice and out of curiosity I bought my seeds from Hoss Tools, the company the lady gardener recommended. I have heard only good things about their seeds in reviews and am curious if all that is true. I am now about six weeks into sowing and I am very happy with the germination rate and growth of my seedlings. They all look healthy. I took a leap of faith and sowed just 1 seed per cell in my 72-cell seed tray. Only 1 cell has nothing in it growing. It could be that I somehow skipped that one when I sowed. Not sure, but I got 71 healthy individual seedlings! So far, I am happy with my purchase as the germination rate is very high and the plants look healthy and strong. I have big expectations for a large harvest if my local critters which are countless won’t collect my harvest before I do.
What is the best seed starting medium?
The best seed starting medium is one that drains well but holds adequate moisture. Use the mix that will provide your young seedlings with adequate feed. Most starting mixes do not have any plant food; therefore growers need to feed their young seedings with liquid feed. I do not use a seed starting mix, because I know a better way to start seeds in. Continue reading to find out what I use instead of the seed starting mix.
Most seed starting mediums are a mix of peat moss, or coco coir, with pearlite, vermiculite, and lime for HP balance. Most of them do not have any nutrients for the growing plant. To me, a starting mix is a rip-off, sorry, it is true. I put it out there. I never buy a seed starting mix. Once you have some experience gardening and you read the ingredients of a seed starting mix, you get sticker and ingredients shock. I should pay how much for a bit of peat moss and perlite? No, thank you. A well-fed seedling is a strong seedling. If the seedling grows and has no nutrients it will become weak. Some grow their seedlings in seed-starting mixes with no additional feeding to the plants. I do not like to use liquid feed indoors. What I use is organic grower’s mix with compost, lobster, kelp, and fish bone meals, worm casting and mycorrhizae, and natural slow-release nitrogen. It has all that my young seedlings need to grow strong and healthy. I did not lose any seeds or seedlings using this grower mix. It has no smell; it is very dark and so far, my seedlings are happy in it. I also use this mix for my indoor plants, amaryllises which I collect and have them blooming all year indoors. I use Coast of Maine, Stonington Blend Organic, & natural grower’s mix. I am not sponsored by them, but I wish I would be! If you are from the company, please get in touch, I would like to work with you as I like the good quality product that I use!
Some gardeners choose to make their own seed starting mix and like it is with everything, every gardener uses a different recipe for their own seed starting mix. Here is one of the most popular ones. 4 parts of compost, 1 part perlite, 1 part vermiculite, and 2 parts of peat moss. Some gardeners use only their own homemade compost to start seeds in. As you garden try different methods and recipes, to find out what works best for you.
My beloved mommy started her seeds in regular garden soil she dug outside in the garden. She didn’t have any fancy seed starting mixes available so she only used garden soil. And she was a great grower! We always had a full pantry of home-grown food preserved. It is only in these modern times that companies came up with seed-starting mixes and ingredients. Our forefathers only used regular garden dirt, and they all lived and grew food. Use what you have and do not be afraid to experiment.
Best containers to start seeds
The best containers to start seeds in are the ones that are durable and last multiple seasons, hold the soil, drain the water from the bottom and allow the roots to grow deep, and prevent them from root bound.
There is a vast option of commercial seed starting trays. From very affordable ones to very expensive ones. The price usually reflects the quality too. For now, I use the most affordable seed starting trays with a clear plastic dome, because this is what I am willing to spend now. I am however planning to get sturdy plastic seed trays that will last me decades and have a great design to accommodate healthy root growth. Since each year I garden on a budget, I am planning to buy one seed tray each year, or I might buy in bulk if the price is more favorable.
However, you do not have to buy any seed trays. Seeds can be started in anything that holds the soil in, drains water well, and is non-toxic. If you are a gardener on a budget, or just started a garden and you are surprised how much it already costs, then simply start your seeds in other containers like yogurt cups, sour cream containers, cottage cheese containers, egg cartons, plastic milk or juice containers, plastic cups or cups made of Styrofoam or paper, ice cream containers, salad or deli trays. If it held food before, you can create holes on the bottom and can hold soil in, then you can use it to grow seeds.
If you prefer to go the seed tray route, and still keep on the budget, get the most affordable seed trays at the local hardware stores, garden centers, and even dollar stores.
You can find some used seed trays online in social media groups. People use to throw them away after they take the seedlings out and plant them outdoors. Look around your local nurseries, and garden centers if you could take some seed trays with you after they are discarded.
How to make free plant labels and how to never run out of them
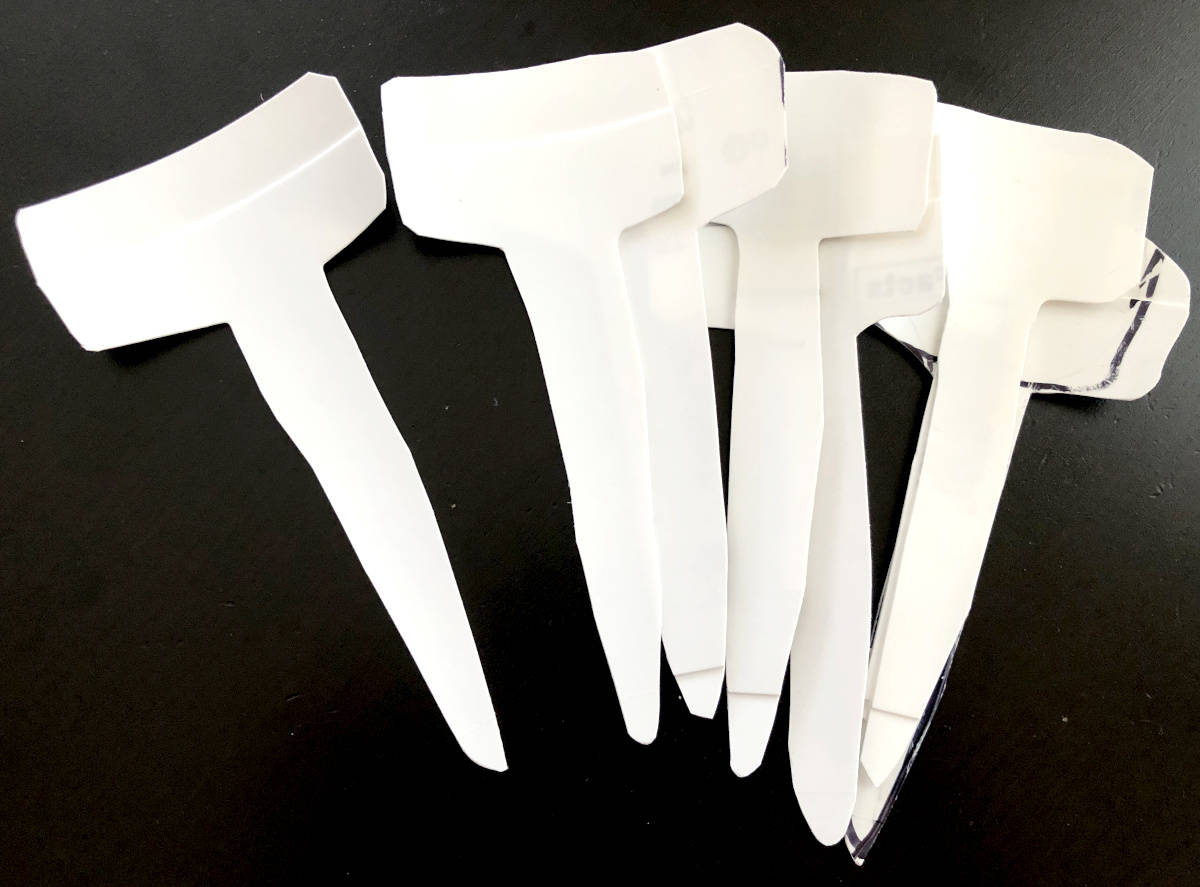
Use clean larger yogurt containers (containers from another dairy like sour cream, cottage cheese, and ricotta will work too). Cut the bottom and the upper end of the container. You will end up with a wide stripe of plastic which you stringent up by rolling in the opposite direction to how it naturally wants to roll. Now cut your labels in any shapes and sizes you like. You can draw the shape of your labels on the plastic with a marker and then cut it out.
Plant labels can be purchased, and made of plastic, wood, or metal. Or if you are like me and prefer to spend your hard-earned money on something else, you can simply make your own plant labels. I have a whole individual article with detailed photo instructions on how I make my own plastic long-lasting labels. I never run out of them, and they are completely free. They can be made as wide, tall, and in the shape you like. Please visit How to make your own free DIY plant labels and why. At some point, I had so many plant labels I had to stop making them. Then I thought, wouldn’t it be nice to make some more and gift them to other home gardeners? A free, valuable, and useful gift for gardening mom, grandma, neighbor, and so on. Below, I shared the new shape I am going to use this growing season as it gives me more writing space on both sides.
How to make your own free DIY plant labels and why
If you give it a try and follow my advice on making your own labels, please share with me and the readers how that worked out for you!
Why and how to label plants
Labeling plants is important to keep track of what you have planted and where. To know what seeds and seedlings are already planted, and which still need to be put out. It helps you remember care instructions, the date you sowed, the date when you can harvest, and identify the plants in your growing space. If you decide to save seeds it is important to recognize what plant seeds you are about to save. Remember months can pass from time to harvest the vegetables and seeds. It is very easy to forget what plants are in your garden and where. Labeling plants is especially crucial if you share your gardening responsibility or if you share space in a community garden.
Related: Why to label plants in garden and how to label them.
How warm does it need to be to start seeds?
For seeds to successfully germinate they need warmth, moisture, and oxygen. Most seeds germinate when the soil temperature is between 68F-86F. To help seeds germinate faster cover your seeds with a clear plastic after you water the seed sowed in the soil, and keep the seed container in a warm place. Some gardeners choose to speed up the germination process by using heat mats, placed under the seed tray while seeds germinate.
I do not use heat mats because I do not have a need for them since my seeds germinate indoors, but I use my grow lights to keep the soil warm to speed up the germination. Your germination process might be different. If the space you germinate your seeds are cool and you find out a heat mat would be helpful give it a try. But a heat mat is not a must when starting seeds as long as the environment you germinate seeds in is warm enough.
Do seeds need light to germinate?
Most seeds do not need light to germinate. They can be sprouted in moist, dark place. However, there are some seeds that do need light to germinate, and most of them are flowers. If you are not sure if the seed you sow needs light, read the instructions on the packaging they came in. If they need light to germinate it will be written on the packaging.
Once the seeds germinated and you see them sprouting above the soil surface it is time to provide them with sufficient light. Plants need light to grow, especially young seedlings require sufficient light to grow healthy and strong to establish themselves.
How often should I water sowing seeds?
Sowed seeds should be watered about once a day. Keep the seedbed moist and do not allow it to dry. The best is to use a spray water bottle or a fine-spray hose nozzle. Always check on seeds when your grow lights go on, or at the beginning of the day and if you see the danger of the soil drying out, spray with water. Use a water bottle or watering can with gentle water distribution to water deeply is needed. Or water from the bottom if you have a tray without holes underneath your seed trays, but do not let your seeds sit in water or too wet soil as they might rot.
Once the seeds sprouted and the seedlings started to grow, provide water about twice a day. Always check the soil before watering, and do not water if the soil is moist. It is very easy to overwater seedlings. When the leaves of the seedlings turn yellow it might be a sign of overwatering. Do not let your seedlings dry out. They might get stressed. Keep the soil moist but do not let the seedlings sit in water as they might rot.
Once your seedlings are ready, plant them outdoors. To know when your seedlings are ready to be planted outdoors and how to do it, visit my other article When and how to plant a seedling.

Why start seeds indoors
There are many benefits to starting seeds indoors. Starting seeds indoors buys you time. The seeds can be started a long time before the last frost is over, and by the time the warmer weather arrives, you have established seedlings ready to be planted in the garden. You can plant seedlings outdoors once the last fort is over rather than just starting from seeds. That means you can harvest earlier. Another benefit is if you grow long-season crops and vegetables in a short-season climate. You can get ahead of the season by starting your long-season crops indoors and planting them as mature seedlings once the weather warms up, which means you just extended your growing season and made a way for long-season crops to be able to ripe and get harvested before the first frost. Starting seeds indoors will also give you control over your seedling as you are able to create a suitable environment for the seeds to germinate and seedlings to grow healthy. Healthy seedlings mean healthy fruit.
Vegetables that need very little space
How do I start a pantry-stocking garden?
How small garden to start with?
